Deck Fill Protection Device
Manufactured by Marsh Marine...Tank Cleaning Professionals
“Our experience is your protection since 1966”


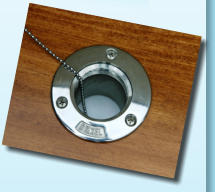
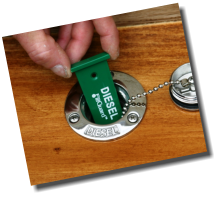
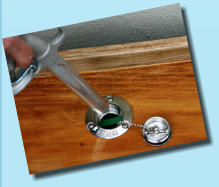
FillGuard is designed to fit virtually any type or
size deck fill. Commonly, there are two types of
fills, Ridged and Ridge-less.
Begin
by
first
examining
your
deck
fill
and
determine
if
the
area
below
the
threads
has
a
narrowing
ridge
as
in
Photo
1
or
is
ridge-
less as in Photo 2.
If
deck
fill
is
Ridged
,
simply
insert
the
appropriate
FillGuard
into
the
fill.
If
the
“T”
bar
is
too
wide,
snip
a
little
off
each
side
until
it
fits
loosely
atop
the
ridge.
Use
the
scribed
guide
lines
on
top
as
a
reference.
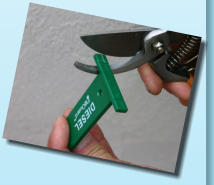
Cut
with
a
garden
snips
or
sharp
cutter
(see
Photo
3).
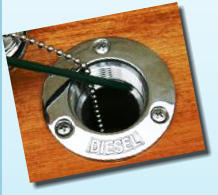
Proper
fit
is
achieved
when
the
FillGuard
can
easily
be
removed
with two fingers (see Photo 4).
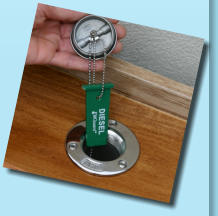
Once
in
place,
FillGuard
prevents
inserting
the
filling
nozzle
until
removed,
thereby
causing
the
user
to
confirm
the
correct
fill
has
been selected (see Photo 5).
If
deck
fill
is
Ridge-less
,
use
the
enclosed
stainless
ball
chain
and
bail
fitting.
Cut
FillGuard’s
top
“T”
bar
close
to
the
base
with
garden
snips
or
some
sharp
cutter.
Remove
the
deck
fill
cap’s
safety
chain
retaining
screw
and
reattach
with
the
provided
bail
fitting.
Use
super
glue
or
Loctite
on
screw
threads
to
prevent
screw
from
loosening.
Do
not
glue
the
bail
fittings.
When
replacing
the
screw
be
sure
not
to
over
tighten.
It
is
important
for
bails
to
pivot
freely
about
the
screw
so
chains
do
not
tangle.
Pass
the
ball
chain
through
the
bail
loop
and
the
hole
in
the
FillGuard.
Connect
chain.
In
this
position,
the
FillGuard
will
pop
out
whenever
the
cap
is removed reminding the user which deck fill is open (see Photo 6).
With FillGuard installed, your deck fill is now protected from accidental filling.